navigation

Monday, October 20, 2014

Around The World Blog Hop


Welcome!  I'm excited to be participating in this Around The World Blog Hop!  Thanks so much for asking me to join, Caroline.  I was fortunate to meet Caroline in person at last year at Spring Market in Portland.  I have been following her on Flickr and IG before that. I have been a fan of her work for a long time. She's an amazing pattern designer, quilter and she knits too!

So here's a little bit about me -

1.  What am I working on?
 
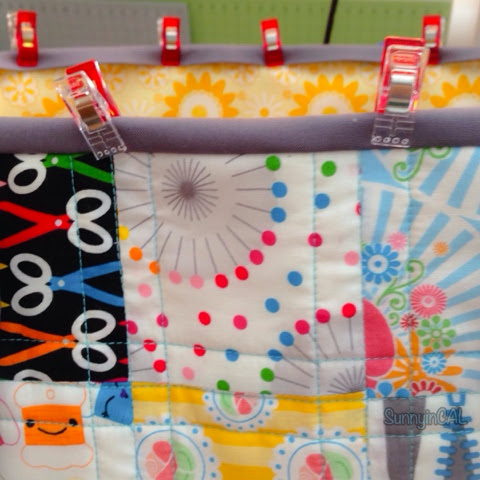
I'm currently working on a quilt right now.  This is a Michael Miller fabric challenge only for Sewtopia attendees.  Amy sent 4 FQs of low volume prints. We are only allowed to use other Michael Miller fabrics for this challenge.  I didn't realize I had so many fabrics in my stash that I could work with....  I'm actually kind of embarrassed....  Here's what I've done so far.  I cut half square triangles (HST's) and added a strip down the middle.  I used 5" squares I cut to make the HST's and the strips measured anywhere from 1.25" - 2".  Then I squared them up to 5".  I made some of them wonky just to change it up.  Each block finishes at 4.5".  


How does my work differ from others of its genre?
 
Something that sets me apart is that my work is varied. You will not see one style from me. I work with traditional blocks as well as modern. Putting a modern spin on a traditional block makes me giddy.  I love machine quilting as well as hand quilting especially with embroidery floss.  I even do raw edge and needle turn appliqué.  I love trying new techniques and applying them to new projects.  I also love an overall scrappy look. 


(One of my many hand-quilted projects.  The finished quilt can be found on my Instagram feed.) 

3.  Why do I create / write what I do?

I started sewing when I was in high school. Just for fun. Then I started sewing again after I became a mom for the first time. After I had my first child, my husband and I decided that I should stay home. After working for several years, staying at home was strange. I'm someone that's always doing something so I decided to sew again...  Turns out I enjoyed it...  ALOT!  Then I discovered designer fabric....  The Modern Quilt Guild.... new friends that provided so much inspiration = I was HOOKED and still am!  

4.  How does my writing / creating process work? 
 
I have a "just do it" attitude when it comes to my projects and my process.  I took an improv class with Denyse Schmidt and it changed my creative process.  The first thing she says is "Just Let Go. Who cares if this doesn't look good right now. It will all look great together at the end."  There are so many times when I'm not crazy about a block I made. Instead of throwing it out, I keep it and continue making more. Once I'm done, I put everything together and it all looks great.  Here's the quilt that I made from here class.  She was right. 


So that's it.  Enough about me..  I would love for you to check out some of these ladies. They are all pretty amazing. 

Amy Morinaka - (is the author of Zakka Handmade:  24 Projects Sewn from Natural Fabrics to Help Organize, Adorn, and Simplify Your Life-   She makes the prettiest things!  I just adore everything she makes.  Check out her feed on IG - (chickchicksewing) and you'll know what I'm talking about. 

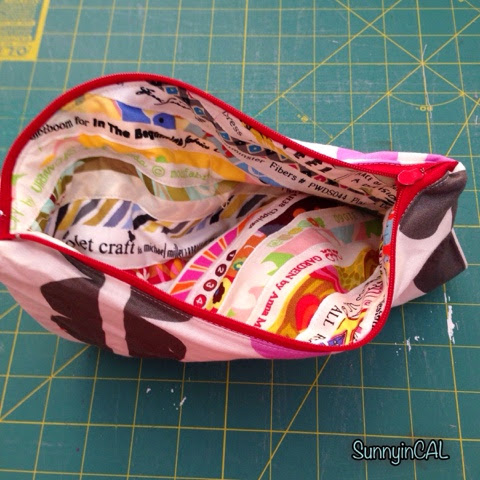
Bonnie Rosales - I love her simple patchwork.  I have never made anything with simple patchwork, but I started to because of all the cute ones that Bonnie's made.  I didn't like pink before, but it's starting to grow on me.  All because of this lovely lady.  She has a great Boxy Pouch Tutorial on her blog.  She's greenletterday on IG.

Jemellia Hilfiger - Have you ever met someone and just clicked right away.  Kinda like you've been friends forever?  That's how I feel about Jemellia!  Talk about a "Just Do It" attitude.....   She started a sewing studio called Je's Bend, she also co-founded Sew OK and now she's part of Sewtopia Chicago.  Plus, he makes great garments and quilts too!  She's jemellia on IG.

Thanks so much for stopping by!  Have a wonderful week! 

Oxox,
Sunny

Wednesday, October 15, 2014

Cascade Blog Hop Tour

If you're here for the Cascade Blog Hop Tour, Welcome! 

 
If you're familiar with my work, you'd know that blue is my favorite color.  I love every shade - from navy to aqua!  So when Jessica Levitt asked me to make some samples for Fall Market with her new line Cascade, I was super excited!  Plus, I was already a fan of her work  - Timber & Kingdom are great lines too.    
 
So check it out....  There are 2 color ways.  Of course, I love the blues, but I'm also loving the other colors she added.  I think I might need some serious yardage of Splash in Fog ( the 3rd one from the top!)  I can see myself using it in a ton of upcoming projects. 


Are you ready to see what I made?!?!
 
This is my Travel Purse.  It's a pattern that I have been working off and on for the past year.  My inspiration for this purse was my mother's Louis Vuitton purse.  She's had this purse as long as I can remember.  Ever since I was little.  I wanted to make it the same shape but also make it fully functional by adding pockets on the sides.  I also made the straps long enough so that it can be placed on your shoulder. The entire bag is all patchwork - 2" squares, quilted and fully lined.  This one I made for Jessica is definitely the best one yet!  I'm happy to say that the pattern will available for sale early next year. 

 
I also made Jessica a little selvage pouch.  Where else is she going to put her make up?!?!  It matches her bag and it has her name all over it = so no one can steal it!  ;) 
 
Here's a tutorial on how you can make one.

 
Last but not least, here's a pillow I made.  The pattern is one that I created called "Waves".  I couldn't resist making "Waves" with Cascade.  I had to play on the whole water theme....  It's made mostly of strips and is a great scrapbusting pattern.  I made this pillow last because I knew there would be many usable pieces from the other projects. 
 
It was quilted with what I call 'lazy diamonds' = Staight lines + Diagonal lines = diamonds on a slant.  It looks like they're lying down, hence the name 'lazy diamonds'.  This pattern will be available for sale as a quilt pattern in Spring 2015.
 
 
There are more Cascade projects in her look book!  And they're all amazing! 
 
Here is the Blog Hop Tour Schedule -
 
Monday October 13th - Jessica Levitt - Juicy Bits / Windham Fabrics
Tuesday October 14th - Julie Herman - Jaybird Quilts / Jenn Nevitt -knit ’n lit
Wednesday October 15th - Amanda Kattner - What the Bobbin / Andy Knowlton - a bright corner
Thursday October 16th - Marci Debataz - Marci Girl Designs / Jennifer Auh Chon - Sunny in CAL
Friday October 17th - Angela Walters - Quilting is my Therapy / Rachel Gander - Imagine Gnats
Saturday October 18th - Elizabeth Timmons - and pins / Andrea Taddicken - knitty bitties
Sunday October 19th - Erin Erickson - Dog Under my Desk / Jessica Skultety - Quilty Habit
 Monday October 20th  - Caroline Press - Trillium Design / Karin Jordan - Leigh Laurel Studios
 
Wait......  There's more!  Windham is giving away a FQ Bundle to one of my lucky followers! 
 
Here are the rules:
 
1)  You must be a follower on my blog & on Instagram (I'm sunnyincal)
 
2)  Leave a comment here -  Answer this question - if you had an unlimited amount of time (hahaha) - what project / quilt would you want to make?
 
3)  Be nice to people.  Seriously..... :)

That's it.  Easy Peasy!  I'll choose a winner on Wednesday, October 22nd.  Good luck, peeps!  Thanks so much for stopping by. 

Thank you so much for letting me play with your fabric, Jessica.  I know your booth with all its pretties will be a big success at Fall Market!

Oxox,
Sunny (aka Jenn)

PS.  All photos courtesy of Jessica Levitt.

Selvage Pouch Tutorial

In my opinion, you can never have too many zipper pouches. I needed a new one for my cutting tools for my upcoming trip to Sewtopia.  (Did I mention how I'm really excited to see all my sewing friends again?!?!) :)

So I made a zipper pouch out of my selvages. I've been collecting these when I started sewing again.  (I have 8 years of selvages!)  I love them because they're so versatile & fun!  I love seeing them and trying to remember what I used that particular print for. It's kinda like a fabric journal....  So let's gets started. 

You'll need:

9" zipper 
2 pieces of batting = 7.25" x 11.25"
2 pieces of lining = 7" x 11"
2 strips of fabric = 2" x 11"
A handful of selvages


With a marking pen, draw a line on your batting measuring 1.5" from the bottom. Do this to both pieces.  The area above the line will be where you'll sew your selvages.


Grab 2 selvage strips and place them together like the photo below.  One should be on top of the other overlapping at least 1/4".  
 

Now top stitch as close to the edge of the selvage as you can. I highly recommend using a stitch length around 2.0. 


Now grab more selvages....


and tuck them underneath...
 
 
and continue to top stitch.... 


Once you've finish the bottom half, sew the other selvages by placing them on top of the previous strip. No tucking under this time. 


When you've finished, your panel should look like this. 

 
Remember that line we drew?  

 
Place the 2" x 11" strip at the line. 

 
Attach the strip using a 1/4" seam allowance and quilt it.


Now work on your other panel. You can either do the same direction or do the opposite.  I'm doing the opposite - simply based on my preference. 
 

Attach the selvages the same way we did prior.  Your panels should look like these. 
 

Now let's give them a haircut.  Align your ruler so that the seam lines up at 1.75". Then trim your block to 7" x 11". 


Here's what they should look like....

 
Now pick which panel will be the front.  Place your zipper face down to the front panel (both right sides together).  Your zipper pull should be on the left.  Make a zipper sandwich by placing your lining face down to the back of your zipper.   Use pins to hold it all in place and sew all 3 layers together. 

 
It should look like this.  Then, do the same to the other side. 

 
Give it a good press away from the zipper. 

 
I top stitch on both sides so the lining doesn't ride up and jam my zipper.

 
Now line up your panels to match like this...


and here...  Use pins to hold them in place.
 
 
Stitch all the way around using a 1/4 seam allowance.  But leave a small opening (about 3") so you can turn it out.
 
 
Trim your corners and then ....
 
 
Turn it out.... Pull!  Tug!  Do it gently...

 
Sew your opening either by hand or machine and that's it.  You're done!  Here's the front.

 
And here's the back.
 
 
Look at how much stuff it holds!  Those are my large scissors!  My rotary cutter is buried at the bottom. 

 
That's all folks!  Now go make one!  ;)
 
 
Hope you've been inspired to travel handmade.  Enjoy!
 
Oxox,
Sunny

Thursday, October 2, 2014

Perfect Patchwork Tote Tutorial

Sorry for the non-existence! I don't know where the time has gone....  Please note - I've been sewing a lot but it's just not here. It's all on Instagram. I'm sunnyincal. So if you're curious as to what I've been working on....  You can take a look over there!  

In about a month, I'll be reuniting with some of my favorite sewing buddies at Sewtopia in Salt Lake City, UT. Or as Amy likes to call it, SL, UT! 

I wanted to make a new purse, but made it way too big, so I turned it into a large tote.  I'm calling it the Perfect Patchwork Tote because it's perfect to take everywhere.  So here's a tutorial.  There's quilting involved as well as binding.  But, you don't have to quilt it. Fusible fleece and Soft & Stable are great alternatives. 

The final size for this tote is roughly about 15" x 15" with a 6" gusset.


For this tutorial, you'll need the following. 

70 - 3.5" squares for the body of the tote (equals 15.5" x 21.5")
2 - 15.25" x 3.5" strips for the bottom of the tote
2 - 32" x 5" strips for the tote handles 
2 pieces of batting strips = 31" x 1"
2 pieces of batting = 24" x 22"
2 pieces of utility / duck cloth or canvas = 24" x 22"
2 - 20" x 15" for the lining
2 - 15" x 3" for the bottom of the lining 
2 - 11.5" x 7.5" for the optional pocket
1 - 2.5" x WOF for top binding 

I'm using all Happy Zombie fabric because it's been begging to be cut.  I combined Sew Yummy & Happy Mochi Yum Yum.  Begin piecing your 3.5" squares with 7 squares across & 5 squares down. For a total of 35.  Make two of these panels. 


Now attach a 15.25" x 3.5" strip to the bottom of your patchwork panel. Place this strip in the center and sew. It should cover the 5 center squares and about an 1/8" on each side.  Like this....


Repeat for the other panel.  Quilt your panels as desired or use some sort of interfacing. I used canvas with batting because I like the stability it gives. 

Once you've quilting both panels, trim all the sides.  Cut a 3" square on the corners on both panels.    


Place right sides of your panel together, sew the sides and sew the bottom. 


Now, sew your corners together like this.  This will box your corners. 


Now turn your tote inside out and get excited!  You just made the outside of your tote!!!   😃


Straps - You will need your 2 - 32" x 5" pieces and 1" batting strips. (You can use interfacing instead of batting.) Press about 1/4" like this at the end. Do the same for the other end. This hides the raw edges. 


Now fold and press in half
 

and then open and press each side toward the center fold-  


the same way you'd make bias tape.  Now insert a strip of batting into one side.  

(Photo below shows the batting outside - tuck your piece inside.)


 Now close and press. 
 

Topstitch your handles.  Go all the way around.  Just outside the edge like so.... 


I add another stitch down the middle just to reinforce it. Totally optional....


Use a washable marking pen.  Mark 2 lines on each side of your topstitched straps. 1.5" and 2.5"


2.5" is where you line up the strap at the top of the tote and the other line is where you will attach / sew it.


Place  & pin one end of your strap between square 2 & 3. Place & pin the other end of your strap between square 5 & 6.


Sew your handles to the tote - I like to stitch the top area at least 2 times because that's usually where it will get loose. I topstitch the same lines where I already stitched when I made my straps.  


Lining -  If you're going to add a pocket, place the 2 - 11" x 7" pieces and place them right sides together. Stitch 1/4" all the around leaving a  2" - 3" opening. Turn it out and then press. Place your pocket about 2" from the top & center (width) of the lining.  Pin & topstitch.


I added a stitch down the middle to make 2 separate pockets. Again, totally optional.
 
Next, let's sew on the bottom strips.  Do the same thing we did for the tote. Center it and sew.

Sew your sides together and then the bottom. Box your corners the same way we did before.  It should look like this.


Place your lining into your tote and pin it.


Give it a quick baste all the way around. (optional)


2.5" x WOF will be just enough to binding your tote and lining together.  Fold your 2.5" strip and press - like you're making binding. 


Attach the binding onto the tote just like you would attach binding to a quilt.


Leave a few inches before sewing it on so you can attach the ends together. Again, just like binding a quilt.


Once you're done, fold over and hand sew it or machine stitch in the ditch. 


Totally up to you.


That's it!  Here's a different one I made using all Cotton & Steel fabric. 
 

I hope you enjoyed this tutorial!  If you make one, I'd love to see it.  Use hashtag #perfectpatchworktote.  Happy Sewing!
 
Oxoxox,
Sunny