navigation

Wednesday, October 15, 2014

Selvage Pouch Tutorial

In my opinion, you can never have too many zipper pouches. I needed a new one for my cutting tools for my upcoming trip to Sewtopia.  (Did I mention how I'm really excited to see all my sewing friends again?!?!) :)

So I made a zipper pouch out of my selvages. I've been collecting these when I started sewing again.  (I have 8 years of selvages!)  I love them because they're so versatile & fun!  I love seeing them and trying to remember what I used that particular print for. It's kinda like a fabric journal....  So let's gets started. 

You'll need:

9" zipper 
2 pieces of batting = 7.25" x 11.25"
2 pieces of lining = 7" x 11"
2 strips of fabric = 2" x 11"
A handful of selvages


With a marking pen, draw a line on your batting measuring 1.5" from the bottom. Do this to both pieces.  The area above the line will be where you'll sew your selvages.


Grab 2 selvage strips and place them together like the photo below.  One should be on top of the other overlapping at least 1/4".  
 

Now top stitch as close to the edge of the selvage as you can. I highly recommend using a stitch length around 2.0. 


Now grab more selvages....


and tuck them underneath...
 
 
and continue to top stitch.... 


Once you've finish the bottom half, sew the other selvages by placing them on top of the previous strip. No tucking under this time. 


When you've finished, your panel should look like this. 

 
Remember that line we drew?  

 
Place the 2" x 11" strip at the line. 

 
Attach the strip using a 1/4" seam allowance and quilt it.


Now work on your other panel. You can either do the same direction or do the opposite.  I'm doing the opposite - simply based on my preference. 
 

Attach the selvages the same way we did prior.  Your panels should look like these. 
 

Now let's give them a haircut.  Align your ruler so that the seam lines up at 1.75". Then trim your block to 7" x 11". 


Here's what they should look like....

 
Now pick which panel will be the front.  Place your zipper face down to the front panel (both right sides together).  Your zipper pull should be on the left.  Make a zipper sandwich by placing your lining face down to the back of your zipper.   Use pins to hold it all in place and sew all 3 layers together. 

 
It should look like this.  Then, do the same to the other side. 

 
Give it a good press away from the zipper. 

 
I top stitch on both sides so the lining doesn't ride up and jam my zipper.

 
Now line up your panels to match like this...


and here...  Use pins to hold them in place.
 
 
Stitch all the way around using a 1/4 seam allowance.  But leave a small opening (about 3") so you can turn it out.
 
 
Trim your corners and then ....
 
 
Turn it out.... Pull!  Tug!  Do it gently...
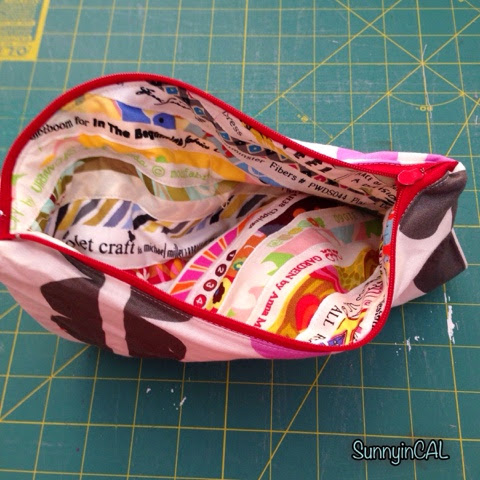
 
Sew your opening either by hand or machine and that's it.  You're done!  Here's the front.

 
And here's the back.
 
 
Look at how much stuff it holds!  Those are my large scissors!  My rotary cutter is buried at the bottom. 

 
That's all folks!  Now go make one!  ;)
 
 
Hope you've been inspired to travel handmade.  Enjoy!
 
Oxox,
Sunny

Thursday, October 2, 2014

Perfect Patchwork Tote Tutorial

Sorry for the non-existence! I don't know where the time has gone....  Please note - I've been sewing a lot but it's just not here. It's all on Instagram. I'm sunnyincal. So if you're curious as to what I've been working on....  You can take a look over there!  

In about a month, I'll be reuniting with some of my favorite sewing buddies at Sewtopia in Salt Lake City, UT. Or as Amy likes to call it, SL, UT! 

I wanted to make a new purse, but made it way too big, so I turned it into a large tote.  I'm calling it the Perfect Patchwork Tote because it's perfect to take everywhere.  So here's a tutorial.  There's quilting involved as well as binding.  But, you don't have to quilt it. Fusible fleece and Soft & Stable are great alternatives. 

The final size for this tote is roughly about 15" x 15" with a 6" gusset.


For this tutorial, you'll need the following. 

70 - 3.5" squares for the body of the tote (equals 15.5" x 21.5")
2 - 15.25" x 3.5" strips for the bottom of the tote
2 - 32" x 5" strips for the tote handles 
2 pieces of batting strips = 31" x 1"
2 pieces of batting = 24" x 22"
2 pieces of utility / duck cloth or canvas = 24" x 22"
2 - 20" x 15" for the lining
2 - 15" x 3" for the bottom of the lining 
2 - 11.5" x 7.5" for the optional pocket
1 - 2.5" x WOF for top binding 

I'm using all Happy Zombie fabric because it's been begging to be cut.  I combined Sew Yummy & Happy Mochi Yum Yum.  Begin piecing your 3.5" squares with 7 squares across & 5 squares down. For a total of 35.  Make two of these panels. 


Now attach a 15.25" x 3.5" strip to the bottom of your patchwork panel. Place this strip in the center and sew. It should cover the 5 center squares and about an 1/8" on each side.  Like this....


Repeat for the other panel.  Quilt your panels as desired or use some sort of interfacing. I used canvas with batting because I like the stability it gives. 

Once you've quilting both panels, trim all the sides.  Cut a 3" square on the corners on both panels.    


Place right sides of your panel together, sew the sides and sew the bottom. 


Now, sew your corners together like this.  This will box your corners. 


Now turn your tote inside out and get excited!  You just made the outside of your tote!!!   😃


Straps - You will need your 2 - 32" x 5" pieces and 1" batting strips. (You can use interfacing instead of batting.) Press about 1/4" like this at the end. Do the same for the other end. This hides the raw edges. 


Now fold and press in half
 

and then open and press each side toward the center fold-  


the same way you'd make bias tape.  Now insert a strip of batting into one side.  

(Photo below shows the batting outside - tuck your piece inside.)


 Now close and press. 
 

Topstitch your handles.  Go all the way around.  Just outside the edge like so.... 


I add another stitch down the middle just to reinforce it. Totally optional....


Use a washable marking pen.  Mark 2 lines on each side of your topstitched straps. 1.5" and 2.5"


2.5" is where you line up the strap at the top of the tote and the other line is where you will attach / sew it.


Place  & pin one end of your strap between square 2 & 3. Place & pin the other end of your strap between square 5 & 6.


Sew your handles to the tote - I like to stitch the top area at least 2 times because that's usually where it will get loose. I topstitch the same lines where I already stitched when I made my straps.  


Lining -  If you're going to add a pocket, place the 2 - 11" x 7" pieces and place them right sides together. Stitch 1/4" all the around leaving a  2" - 3" opening. Turn it out and then press. Place your pocket about 2" from the top & center (width) of the lining.  Pin & topstitch.


I added a stitch down the middle to make 2 separate pockets. Again, totally optional.
 
Next, let's sew on the bottom strips.  Do the same thing we did for the tote. Center it and sew.

Sew your sides together and then the bottom. Box your corners the same way we did before.  It should look like this.


Place your lining into your tote and pin it.


Give it a quick baste all the way around. (optional)


2.5" x WOF will be just enough to binding your tote and lining together.  Fold your 2.5" strip and press - like you're making binding. 


Attach the binding onto the tote just like you would attach binding to a quilt.


Leave a few inches before sewing it on so you can attach the ends together. Again, just like binding a quilt.


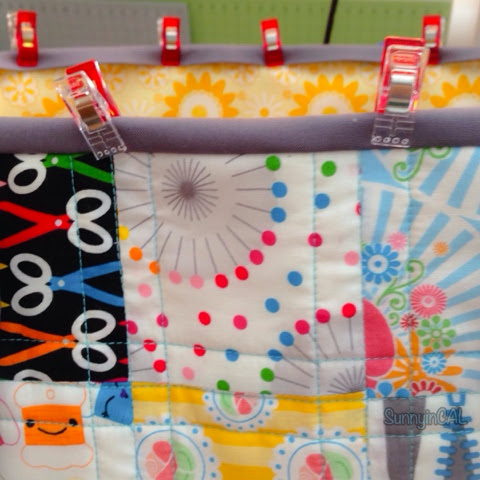
Once you're done, fold over and hand sew it or machine stitch in the ditch. 


Totally up to you.


That's it!  Here's a different one I made using all Cotton & Steel fabric. 
 

I hope you enjoyed this tutorial!  If you make one, I'd love to see it.  Use hashtag #perfectpatchworktote.  Happy Sewing!
 
Oxoxox,
Sunny